Angular + Spring Boot - Hello World Example
In the section, we will create a project for Hello Word Example with Spring Boot 3 and Angular 15.
.png)
Part 1 - Backend development
Step 1: Creating a simple spring boot web application.
First, open the Spring initializr https://start.spring.io/ Then, Provide the Group and Artifact name. We have provided Group name com.knf.dev.demo and Artifact helloworld. Here I selected the Maven project - language Java - Spring Boot 3.0.1 and add Spring web dependency.

Then, click on the Generate button. When we click on the Generate button, it starts packing the project in a .zip(helloworld.zip) file and downloads the project.
Then, Extract the Zip file.
Step 2: Import the project on your favourite IDE, I am using IntelliJ IDEA
Final Project Directory:

Pom.xml
<?xml version="1.0" encoding="UTF-8"?>
<project xmlns="http://maven.apache.org/POM/4.0.0"
       xmlns:xsi="http://www.w3.org/2001/XMLSchema-instance"
   xsi:schemaLocation="http://maven.apache.org/POM/4.0.0
   https://maven.apache.org/xsd/maven-4.0.0.xsd">
   <modelVersion>4.0.0</modelVersion>
   <parent>
      <groupId>org.springframework.boot</groupId>
      <artifactId>spring-boot-starter-parent</artifactId>
      <version>3.0.1</version>
      <relativePath/> <!-- lookup parent from repository -->
   </parent>
   <groupId>com.knf.dev.demo</groupId>
   <artifactId>helloworld</artifactId>
   <version>0.0.1-SNAPSHOT</version>
   <name>helloworld</name>
   <description>Demo project for Spring Boot</description>
   <properties>
      <java.version>17</java.version>
   </properties>
   <dependencies>
      <dependency>
         <groupId>org.springframework.boot</groupId>
         <artifactId>spring-boot-starter-web</artifactId>
      </dependency>

      <dependency>
         <groupId>org.springframework.boot</groupId>
         <artifactId>spring-boot-starter-test</artifactId>
         <scope>test</scope>
      </dependency>
   </dependencies>

   <build>
      <plugins>
         <plugin>
            <groupId>org.springframework.boot</groupId>
            <artifactId>spring-boot-maven-plugin</artifactId>
         </plugin>
      </plugins>
   </build>

</project>
HelloWorldController.java
package com.knf.dev.demo.helloworld.controller;

import org.springframework.web.bind.annotation.CrossOrigin;
import org.springframework.web.bind.annotation.GetMapping;
import org.springframework.web.bind.annotation.RequestMapping;
import org.springframework.web.bind.annotation.RestController;

@CrossOrigin(origins = "*", maxAge = 4800)
@RestController
@RequestMapping("/api/v1/")
public class HelloWorldController {

    @GetMapping("/hello")
    public String hello() {
        return "Hello World";
    }
}
HelloworldApplication.java
package com.knf.dev.demo.helloworld;

import org.springframework.boot.SpringApplication;
import org.springframework.boot.autoconfigure.SpringBootApplication;

@SpringBootApplication
public class HelloworldApplication {

   public static void main(String[] args) {
      SpringApplication.run(HelloworldApplication.class, args);
   }
}
Step 3: Test the APIs using postman

Part 2: Frontend Development
Step 1: Install Node.js
To check if node.js is installed on your system, type node -v in the terminal. This will help you see the version of node.js currently installed on your system.

If it does not print anything, install node.js on your system. To install node.js, go to the homepage, https://nodejs.org/en/download/ of node.js, and install the package based on your OS.
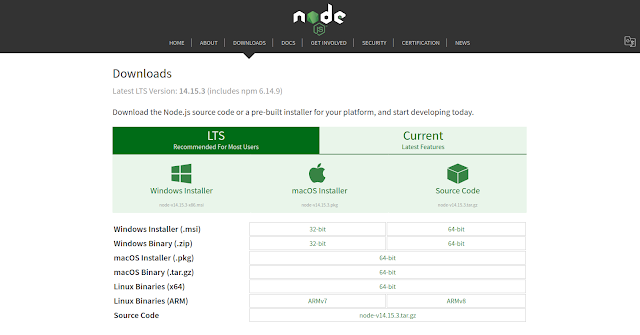
Based on your OS, install the required package. Once node.js is installed, npm will also get installed along with it. To check if npm is installed or not, type npm –v in the terminal as given below. It will display the version of the npm.

Step 2: Installing Angular CLI 15
Head over to a new terminal and run the following command:
npm install --global @angular/cli@next
That's it of everything goes as expected you should have Angular 15 CLI installed on your system.
After installing Angular 15 CLI, you can run many commands. Let’s start by checking the version of the installed CLI:
ng version
You should get a similar output:

Step 3 — Creating a New Angular 15 Project
In our third step, we’ll use Angular CLI to create our example project. Go back to your terminal and run the following commands:
ng new helloworld
You’ll get prompted for a couple of things — If Would you like to add Angular routing? Say y and Which stylesheet format would you like to use? Pick CSS. This will set up routing in our project and set CSS as the stylesheets format for components.

Final Project Directory

package.json
{ "name": "helloworld", "version": "0.0.0", "scripts": { "ng": "ng", "start": "ng serve", "build": "ng build", "watch": "ng build --watch --configuration development", "test": "ng test" }, "private": true, "dependencies": { "@angular/animations": "^15.1.0", "@angular/common": "^15.1.0", "@angular/compiler": "^15.1.0", "@angular/core": "^15.1.0", "@angular/forms": "^15.1.0", "@angular/platform-browser": "^15.1.0", "@angular/platform-browser-dynamic": "^15.1.0", "@angular/router": "^15.1.0", "rxjs": "~7.8.0", "tslib": "^2.3.0", "zone.js": "~0.12.0" }, "devDependencies": { "@angular-devkit/build-angular": "^15.1.1", "@angular/cli": "~15.1.1", "@angular/compiler-cli": "^15.1.0", "@types/jasmine": "~4.3.0", "jasmine-core": "~4.5.0", "karma": "~6.4.0", "karma-chrome-launcher": "~3.1.0", "karma-coverage": "~2.2.0", "karma-jasmine": "~5.1.0", "karma-jasmine-html-reporter": "~2.0.0", "typescript": "~4.9.4" }}Create hello.service.ts
Path - src/app/services/hello.service.ts
The HelloService will be used to get the data from the backend by calling APIs. Update the hello.service.ts file inside src/app/services directory with the following code to it -
import { Injectable } from '@angular/core';import { HttpClient } from '@angular/common/http';import { Observable } from 'rxjs';
const API_URL = 'http://localhost:8080/api/v1/';
@Injectable({  providedIn: 'root',})export class HelloService {  constructor(private http: HttpClient) {}
  getServerMessage(): Observable<any> {    return this.http.get(API_URL + 'hello', { responseType: 'text' });  }  }
app.component.ts
import { Component, OnInit } from '@angular/core';import { HelloService } from './services/hello.service';
@Component({  selector: 'app-root',  templateUrl: './app.component.html',  styleUrls: ['./app.component.css']})export class AppComponent implements OnInit {  content?: string;
  constructor(private helloService: HelloService) { }
  ngOnInit(): void {    this.helloService.getServerMessage().subscribe({      next: data => {        this.content = data;      },      error: err => {        if (err.error) {          try {            const res = JSON.parse(err.error);            this.content = res.message;          } catch {            this.content = `Error with status:                  ${err.status} - ${err.statusText}`;          }        } else {          this.content = `Error with status: ${err.status}`;        }      }    });  }}
import { Component, OnInit } from '@angular/core';import { HelloService } from './services/hello.service';
@Component({ selector: 'app-root', templateUrl: './app.component.html', styleUrls: ['./app.component.css']})export class AppComponent implements OnInit { content?: string;
constructor(private helloService: HelloService) { }
ngOnInit(): void { this.helloService.getServerMessage().subscribe({ next: data => { this.content = data; }, error: err => { if (err.error) { try { const res = JSON.parse(err.error); this.content = res.message; } catch { this.content = `Error with status: ${err.status} - ${err.statusText}`; } } else { this.content = `Error with status: ${err.status}`; } } }); }}app.component.html
<div class="myDiv"> <p>{{ content }}</p></div>
<div class="myDiv"> <p>{{ content }}</p></div>app.component.css
.myDiv{ border:solid 1px #0094ff; padding:10px; margin:5px; font-size:15px; font-family:Verdana; text-align:center; border-radius:10px;} .myDiv:hover{ background-color:#808080; color:#fff; font-weight:bold;}
.myDiv{ border:solid 1px #0094ff; padding:10px; margin:5px; font-size:15px; font-family:Verdana; text-align:center; border-radius:10px;} .myDiv:hover{ background-color:#808080; color:#fff; font-weight:bold;}app.module.ts
import { NgModule } from '@angular/core';import { BrowserModule } from '@angular/platform-browser';import { HttpClientModule } from '@angular/common/http';import { AppRoutingModule } from './app-routing.module';import { AppComponent } from './app.component';
@NgModule({  declarations: [    AppComponent  ],  imports: [    BrowserModule,    AppRoutingModule,    HttpClientModule  ],  providers: [],  bootstrap: [AppComponent]})export class AppModule { }
import { NgModule } from '@angular/core';import { BrowserModule } from '@angular/platform-browser';import { HttpClientModule } from '@angular/common/http';import { AppRoutingModule } from './app-routing.module';import { AppComponent } from './app.component';
@NgModule({ declarations: [ AppComponent ], imports: [ BrowserModule, AppRoutingModule, HttpClientModule ], providers: [], bootstrap: [AppComponent]})export class AppModule { }Run the application.
Step 1: Download or clone the source code from GitHub to a local machine - Click here
Backend
Step 2: mvn clean install
Step 3: Run the Spring Boot application - mvn spring-boot:run
Frontend
Step 4: npm install
Step 5: ng serve
Step 1: Download or clone the source code from GitHub to a local machine - Click here
Backend
Step 2: mvn clean install
Step 3: Run the Spring Boot application - mvn spring-boot:run
Frontend
Step 4: npm install
Step 5: ng serve